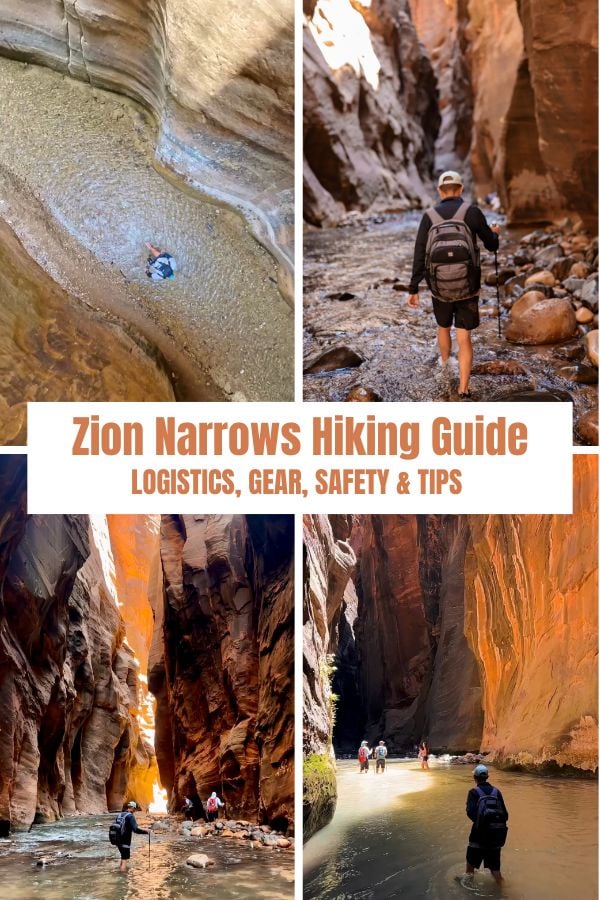
Hiking the Narrows in Utah’s Zion National Park is one of the most unique hikes we’ve done in the Southwest. It combines beauty and adventure as you wade through the winding Virgin River surrounded by towering canyon walls. It is absolutely incredible, but it does require some planning and preparation.
In this guide, I’ll share everything you need to know to plan your hike, stay safe, and make the most of this epic experience!
*Disclaimer: This post contains affiliate links. If you purchase a product or book a tour through the link, then we receive a small commission at no extra cost to you. We really appreciate your support!
A Complete Guide to Hiking the Zion Narrows This Summer
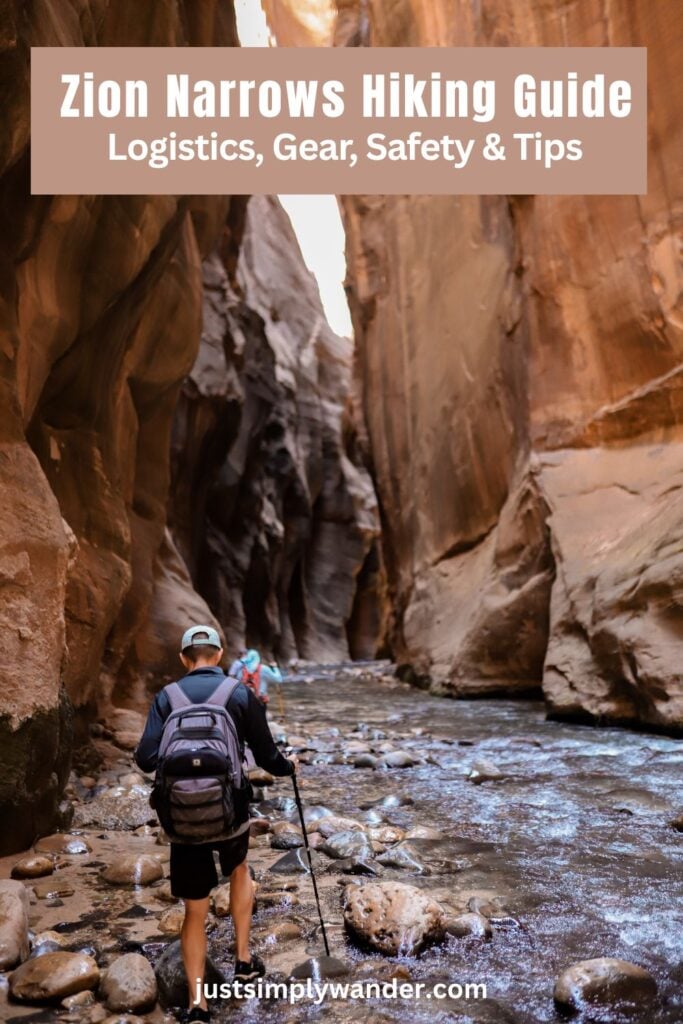
Table of Contents
- Visitor Information
- When is the Best Time to Hike the Narrows?
- What Should I Wear When Hiking the Narrows?
- What Gear Do I Need When Hiking the Narrows?
- Shuttle Information
- Alternatives to Taking the Shuttle
- Riverside Walk to The Narrows
- What to Expect When Hiking the Narrows
Visitor Information
- Location: Zion National Park near Springdale, Utah
- Seasonal Openings: The Narrows hike is open year-round, but can be closed due to high water levels or flash flood warnings. Check the Zion National Park website for updates.
- Entrance Fee: $35 per vehicle. America the Beautiful National Park annual passes are accepted here.
- Permit: You do not need a permit to hike the Narrows from the bottom up to Big Springs. A Zion Wilderness Permit is required if you plan to hike from the top down.
- Trail Distance: 9.4 miles out-and-back to Big Springs (according to the the NPS website), but you can turn around at any point.
- Difficulty Rating: Rated moderate due to the distance and the challenge of navigating upstream through a rocky river.
- Minimum Age: There is no minimum age requirement, but I personally recommend the Narrows for kids ages 10 years and up (younger kids can be carried in a hiking backpack). You know the abilities of your child the best, but they’ll need to navigate through cold water that can get up to neck deep in a few spots, depending on their height. If you are bringing younger kids, you can always hike up a mile or two, then turn around if it’s too much for them.
When is the Best Time to Hike the Narrows?
The most popular time to hike the Narrows is in the summer and early fall when the temperatures are warm. However, it is also the most crowded. Monsoon storms are also common during late summer and early fall, so check the weather before you go. The trail will close if heavy rain is in the forecast, as this area is at a high risk for flash flooding. Check the current conditions for updated information.
In the late Spring, the temperatures begin to warm up, and the trail isn’t as crowded. However, the water level is often higher due to snow melt. If the river’s flow rate is over 150 cubic feet per second, they will close the trail. Click the link for the current flow rate.
Winter is the least crowded, and you will not be required to take the shuttle bus. However, the road is sometimes closed due to snow. The biggest challenge if you’re hiking in the winter is the frigid temperatures. You will need to wear a drysuit, which can be rented from Zion Outfitters.
Hiking the Narrows is a different experience in each season. This guide will tell you what to expect when hiking in the summer.
What Should I Wear When Hiking the Narrows?
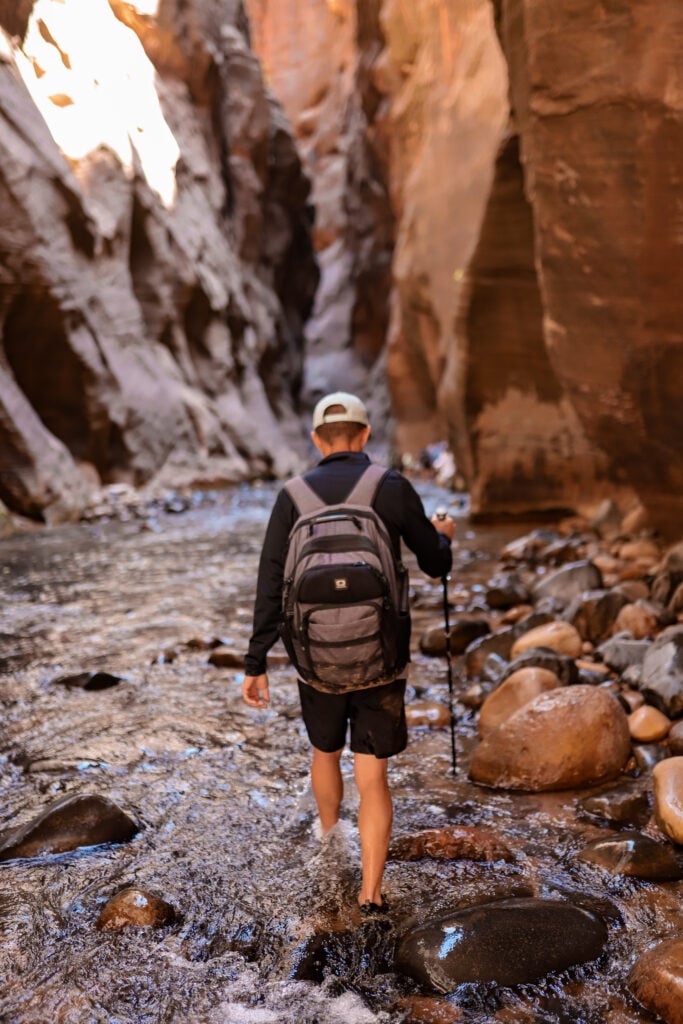
- Dress in Layers: The canyon can be quite cold, especially in the morning when you’re hiking through cold water in the shade. It was only 60 degrees when we started our hike around 9 am in June. I recommend wearing layers that you can shed as it gets warmer later in the day. Wear lightweight shorts instead of leggings since they dry much faster. I love these CRZ Yoga shorts. They are very similar to my Lululemon running shorts, but for a fraction of the cost. I also recommend wearing a lightweight dri-fit jacket that will keep you warm but won’t be too bulky to carry once you take it off.
- Water Shoes: You’ll need closed-toe water shoes so that you don’t stub your toes on the rocks. You’ll also want ones with sturdy, thick soles for walking over all the rocks. I love running in Hokas, and I was excited when I saw that they made water shoes. I tried them out on this hike and loved them!
- Neoprene Socks: Your skin will rub raw while walking in wet shoes, but you can prevent this by wearing neoprene socks. Any socks will do, but these are designed for water and will also help keep your feet warm.
- Shoe Gators: One of the most irritating things we experienced on this hike was that small pebbles kept getting stuck in our shoes. If you are wearing water shoes that don’t have holes in the sides (like these water shoes that are similar to the ones my husband wore), then I recommend wearing shoe gators to prevent pebbles from getting in.
What Gear Do I Need When Hiking the Narrows?
- Hiking Poles: Hiking poles are a must to help with balance on the slippery rocks. These are the hiking poles that I used, and they worked great. I will say that a few people in our group snapped their aluminum poles when they would get stuck on the rocks. Make sure you bring 2 poles in case one breaks. Another option is this wooden hiking stick. It is sturdy enough that it won’t break, but I love that it comes apart, so it’s more convenient for traveling.
- Dry Bag: You will get wet on this hike! Bring a dry bag for phones, snacks, keys, cameras, and anything you want to keep dry. This is the dry bag I used, and I like that it’s more of a backpack-style with comfortable shoulder straps.
- WAG Bag: There are no restrooms once you’re in the river, so you’ll need to bring WAG bags to pack out any human waste.
- Water Bladders: The river water cannot be filtered due to toxic cyanobacteria, so you will need to bring plenty of water to stay hydrated. I recommend each hiker carry at least one 2L water bladder. It takes up less space and weight than regular water bottles. I also recommend throwing a few electrolyte tablets into your water to make sure you stay hydrated.
- Chafing Cream: After spending hours in wet clothes, it’s common to experience chafing on your thighs, arms, and other sensitive areas. I recommend throwing this chafing balm into your bag just in case!
If you don’t have your own gear, you can rent water shoes, hiking sticks, and waterproof backpacks from Zion Outfitters.
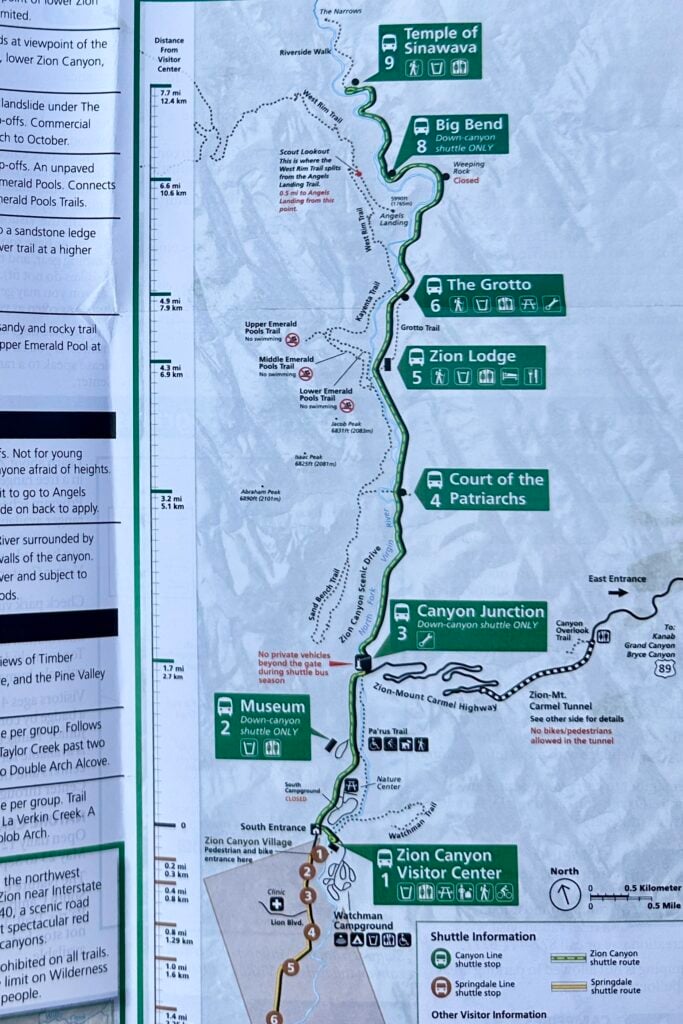
Shuttle Information
The Narrows is located at the end of Zion Canyon Scenic Drive. From mid-March through late November, the road is closed to private vehicles, and you’ll need to take the Zion Canyon Shuttle to access the trailhead.
Reservations are not required, it is first-come first-served. The first shuttle leaves the visitor center at 6:00 a.m., and trust me, you’ll want to catch an early one!
The parking lot at the visitor center usually fills up before 9:00 a.m.. Once it’s full, you’ll have to park in Springdale and take an additional shuttle just to get into the park.
We visited on a Friday morning in June. We got to the park around 7:30 am, and the lot was almost full. The line for the shuttle was already getting long, and we ended up waiting for about 30-40 minutes.
The park website says that the shuttles run every 5-10 minutes. When we visited, it was closer to 15 minutes, but they did have 2 shuttles running together.
If you decide to go later in the afternoon to avoid the morning rush, just be aware that the last shuttle leaves the Temple of Sinawava stop (where the hike to the Narrows begins) at 8:15 pm. If you miss it, you’ll be hiking 8 miles back to the visitor center!
Alternatives to Taking the Shuttle
If you want to avoid the shuttle bus altogether, you can rent e-bikes and ride up the canyon. There are several rental shops to choose from, but Zion Outfitters is the closest to the park entrance.
This option gives you the freedom to go when you want, and the flexibility to stop along the way for photos and other short hikes. If you have the time and energy after hiking the Narrows, the Emerald Pools Trail at stop #5 and the Grotto Trail at stop #6 are easy hikes that pack a punch.
The ride from Zion Outfitters to the Temple of Sinawava parking lot is 7.9 miles each way, so plan accordingly.
Another option is to book a room at the historic Zion Lodge located at shuttle stop #5.
Guests at the lodge are allowed to drive their vehicle up the canyon road and park at the lodge. You will still need to take the shuttle from here to the trailhead, but it’s easier to hop on the first shuttle up the canyon and avoid the lines and crowds.
It’s 3.8 miles from the lodge to the trailhead if you want to walk it, or bring a bike.
Riverside Walk to The Narrows
You’ll ride the shuttle bus for about 30 minutes to the Temple of Sinawava. This is stop #9, the last stop on the route.
There are restrooms here, and I highly recommend using them since there are no more restrooms beyond this point.
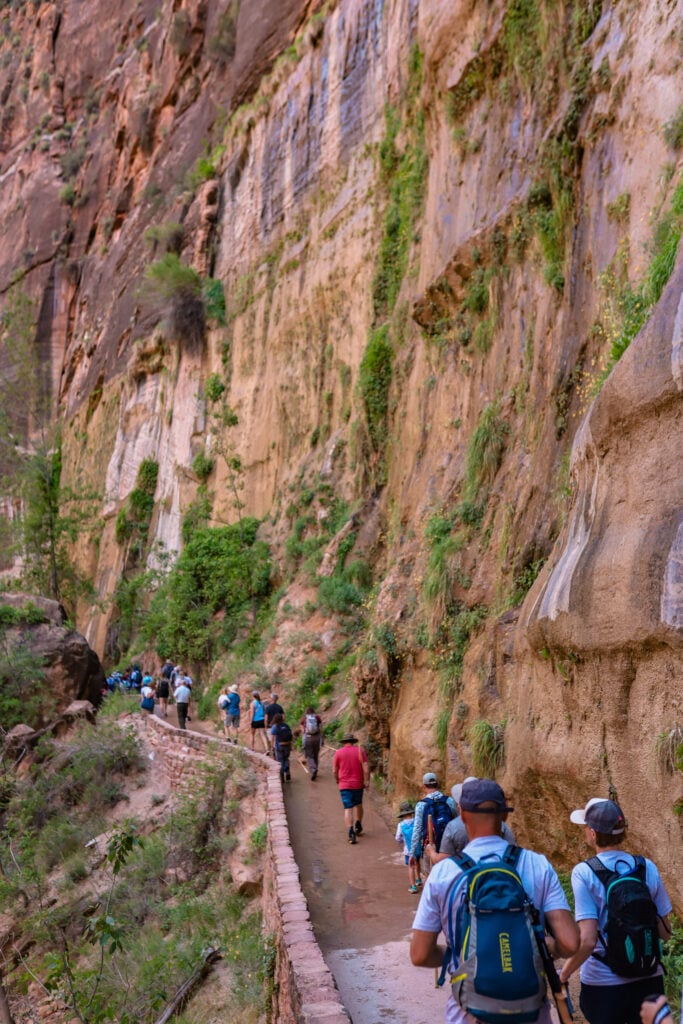
To reach the beginning of the Narrows, you’ll first take the easy one-mile Riverside Walk trail that starts at the Temple of Sinawava shuttle stop.
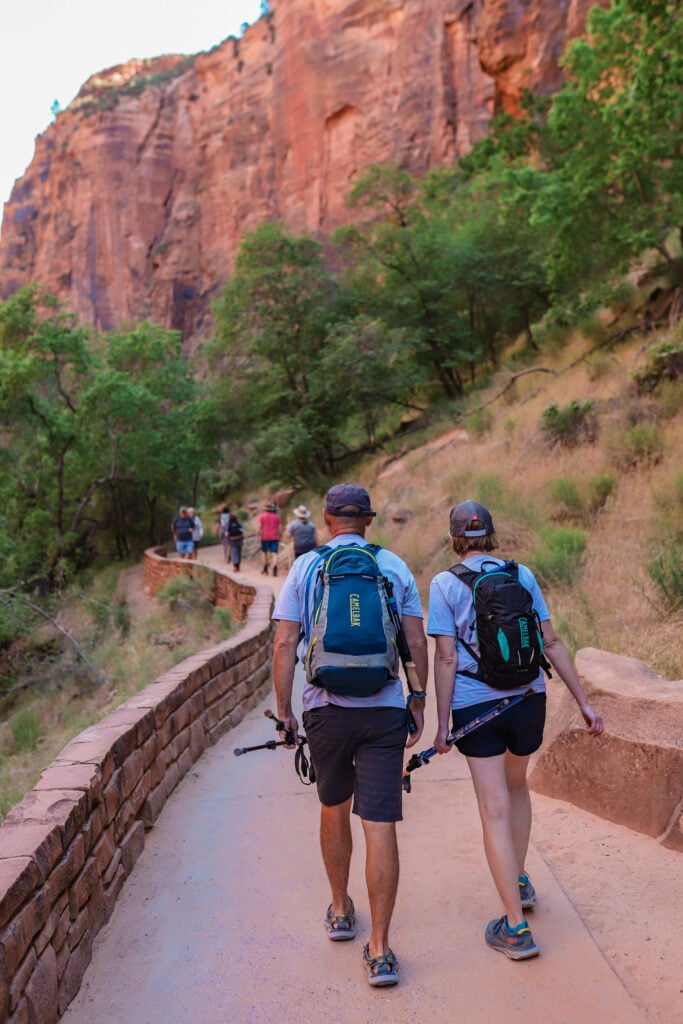
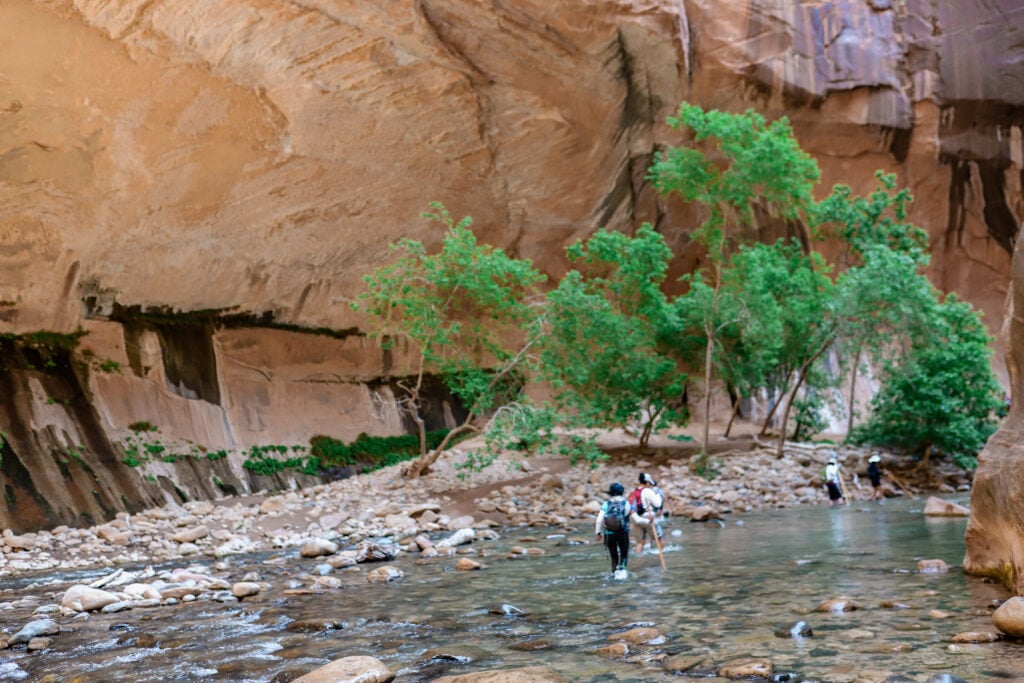
The paved path runs alongside the Virgin River and offers gorgeous views of the scenic river and towering canyon walls with hanging gardens.
I knew that the Narrows would be beautiful, but I wasn’t prepared for how much I would enjoy this part of the hike!
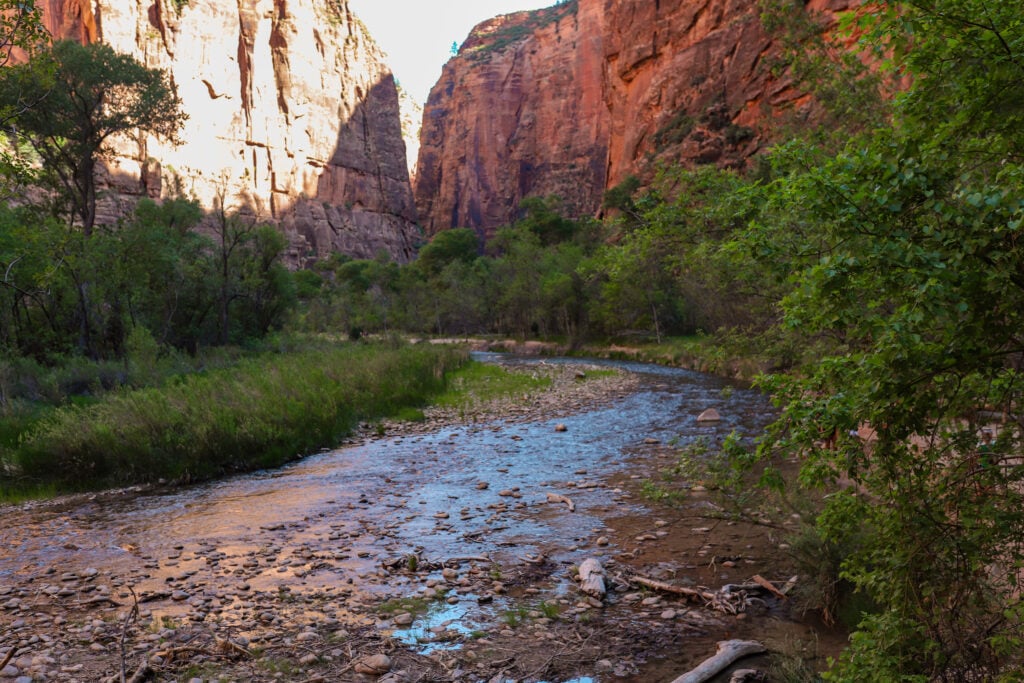
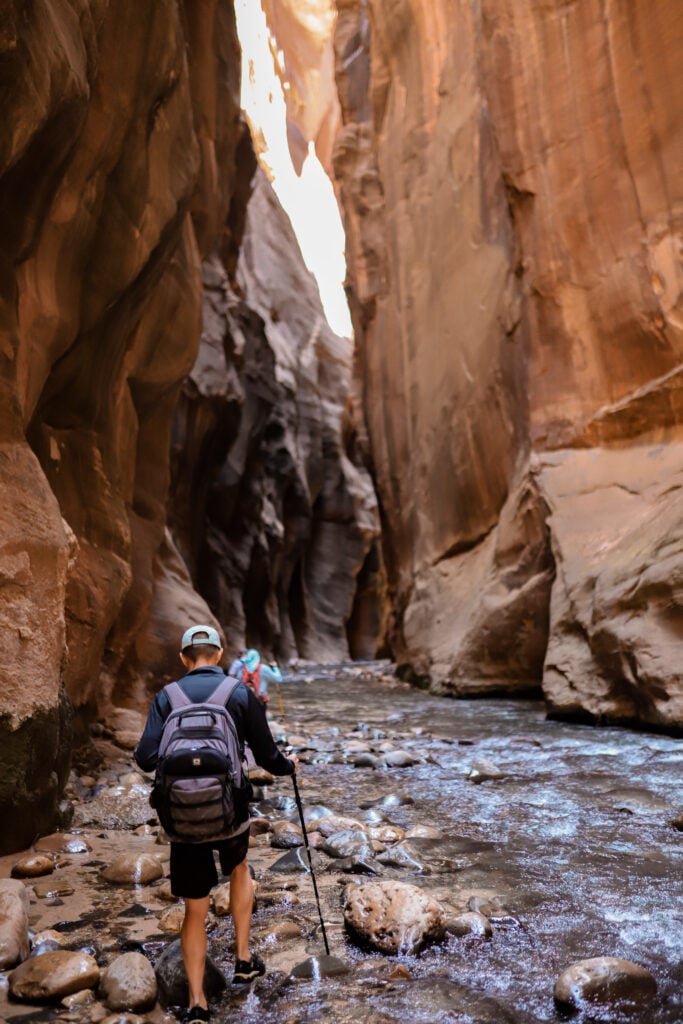
At the end of Riverside Walk, you’ll reach the river. From here, the real fun begins as you’ll be hiking in the river the rest of the way!
What to Expect When Hiking the Narrows
As soon as you step into the water, you might be surprised just how chilly the river is, even in the summer.
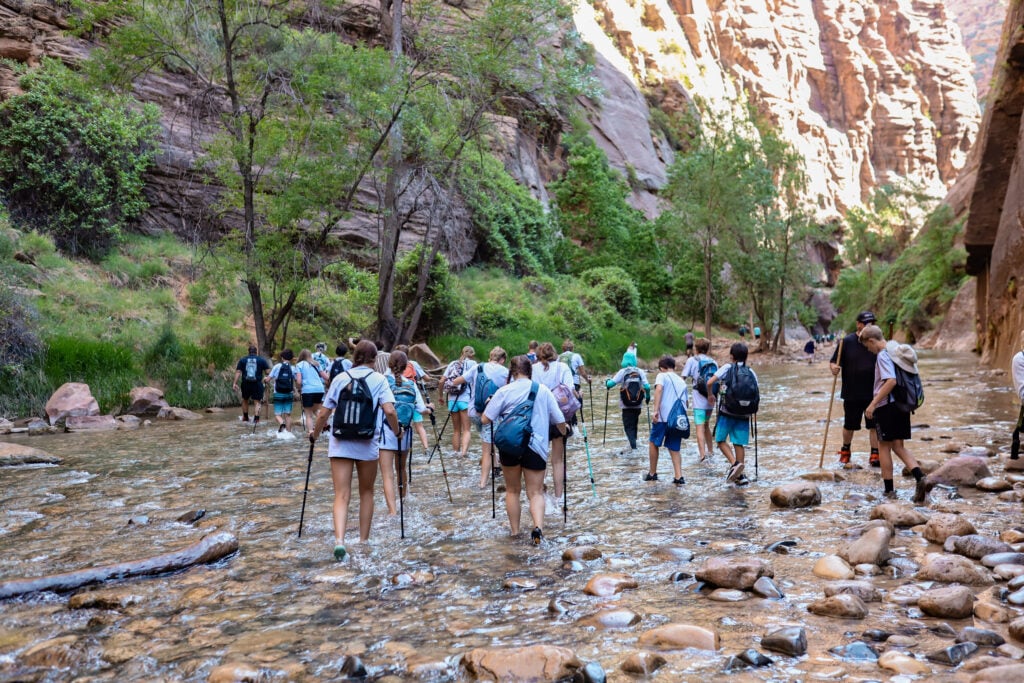
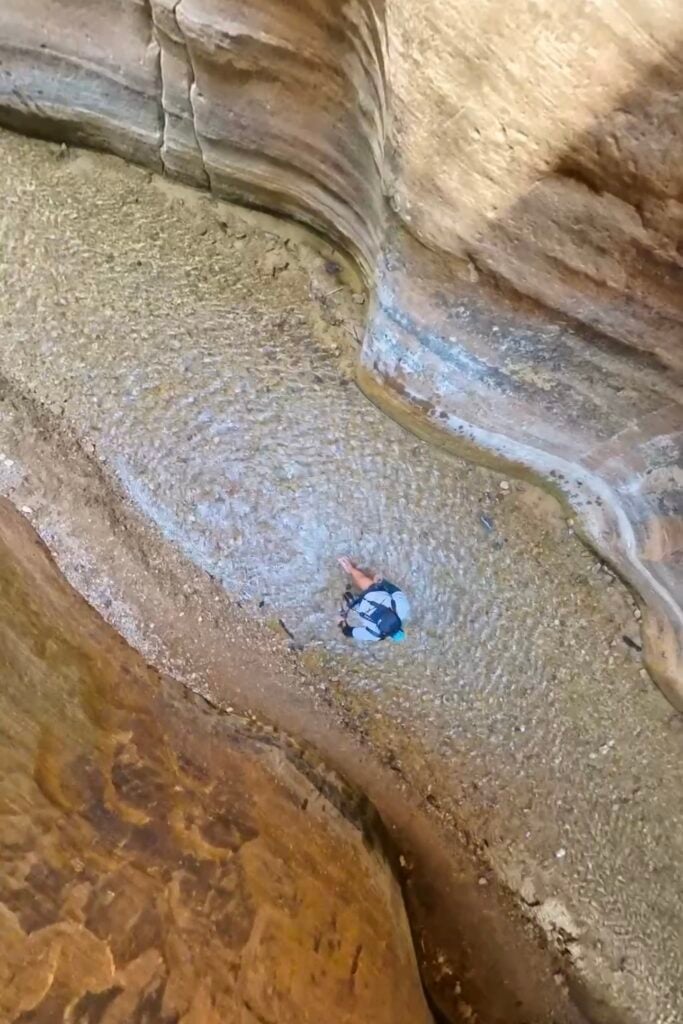
Most of the time, the water is pretty shallow and doesn’t go above your knees, but there are a few deeper spots that can reach your waist or even chest.
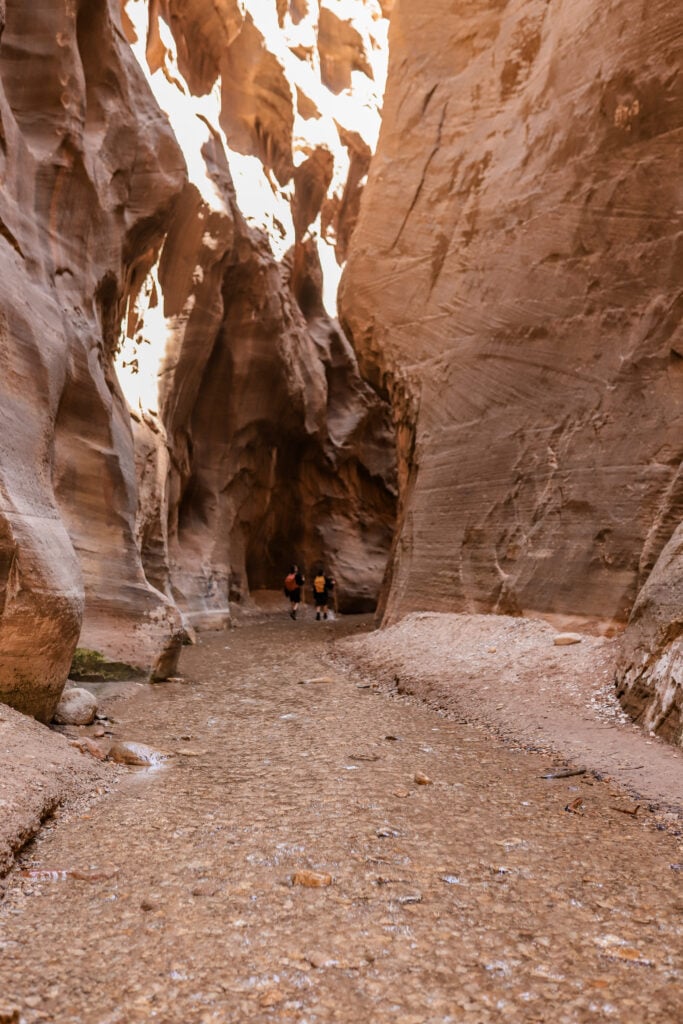
The trail is easy to follow. Sometimes you’ll be walking in the river, sometimes you’ll be crossing back and forth, and sometimes you’ll be following alongside the river on dry ground.
You won’t get lost, but it is helpful to use AllTrails Pro so that you can download the map offline and track your progress on the route.
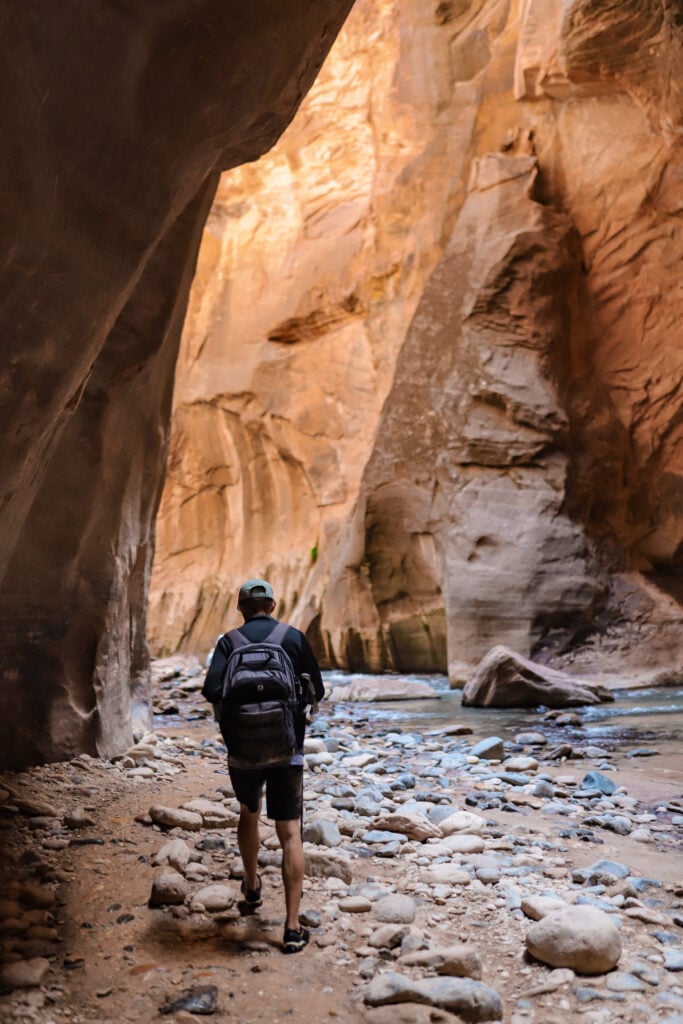
The trail starts in the open canyon, but the further you go, the narrower the canyon becomes and the more jaw-dropping the scenery gets.
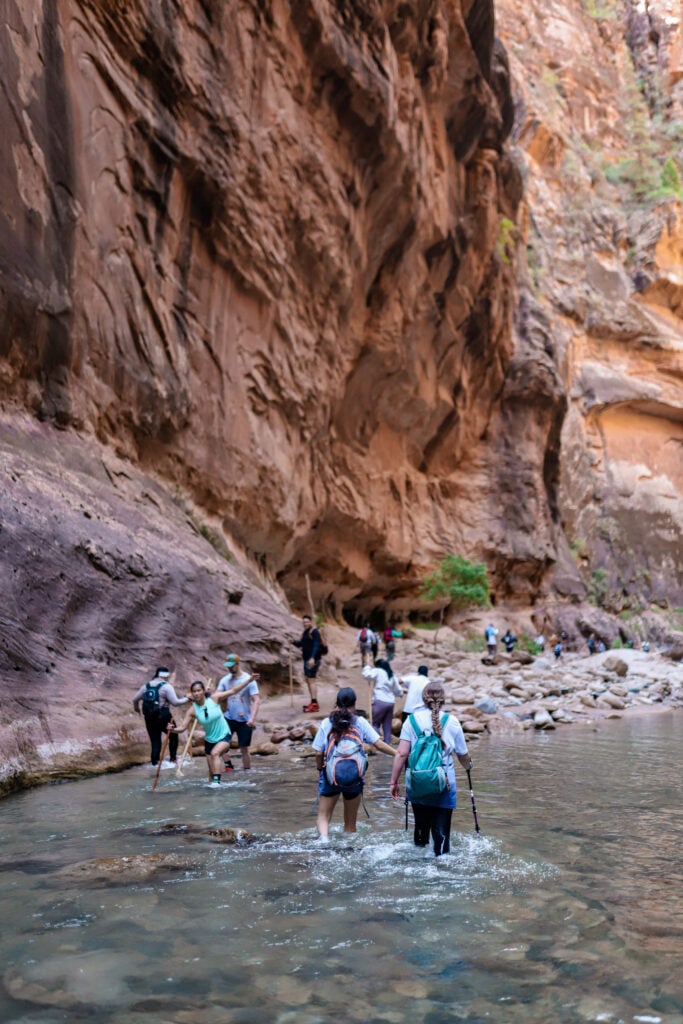
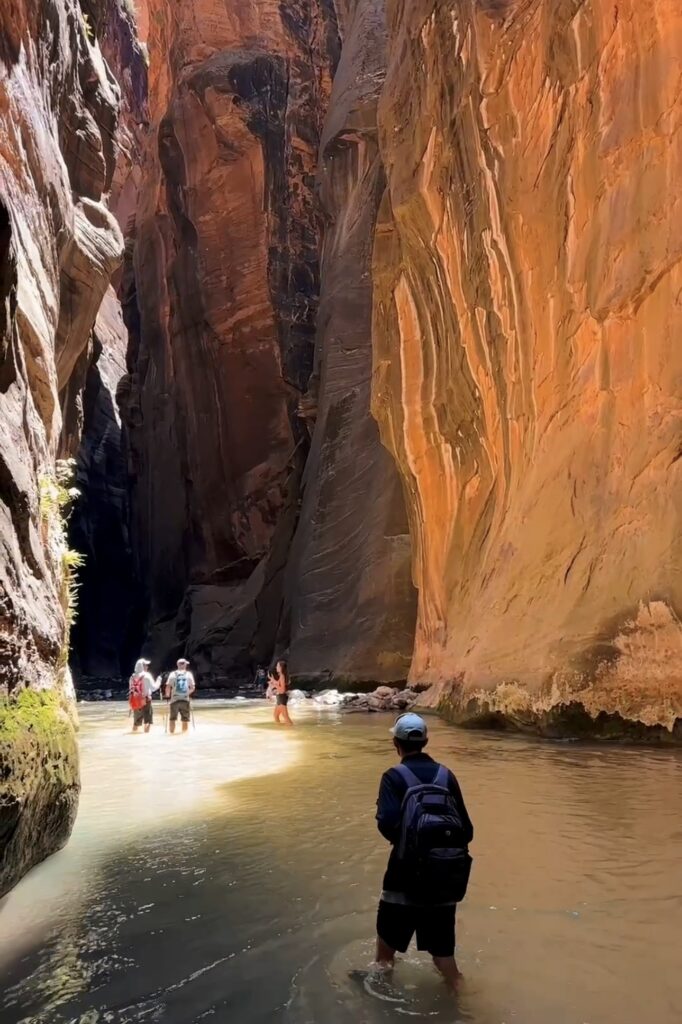
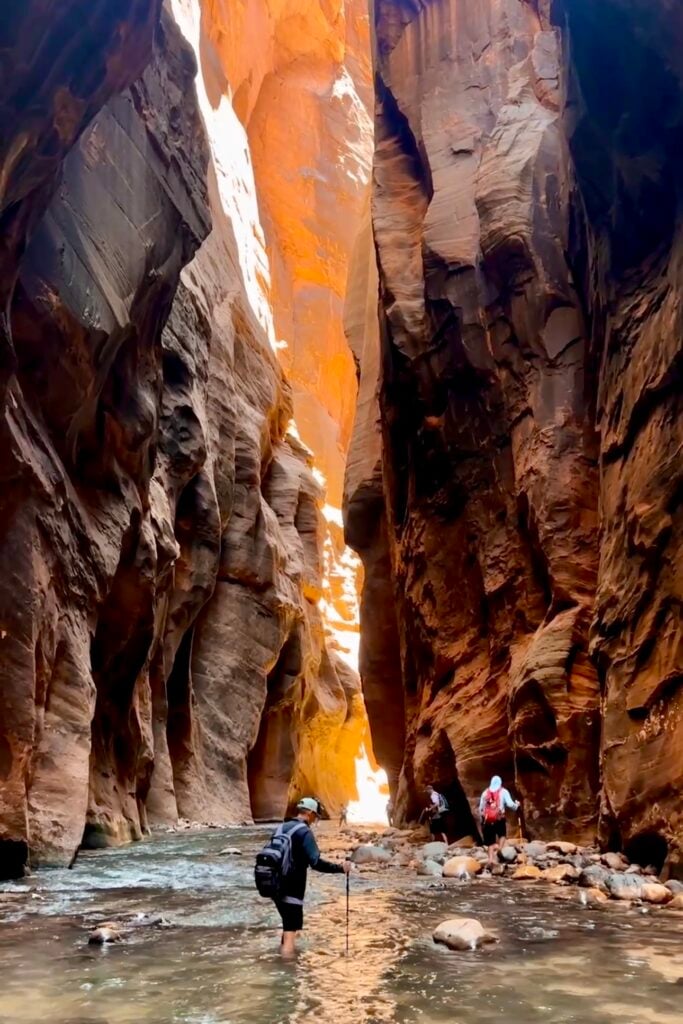
Around mile three (1 mile on the Riverside Walk and 2 miles in the river), you’ll reach the beginning of the famous Wall Street section.
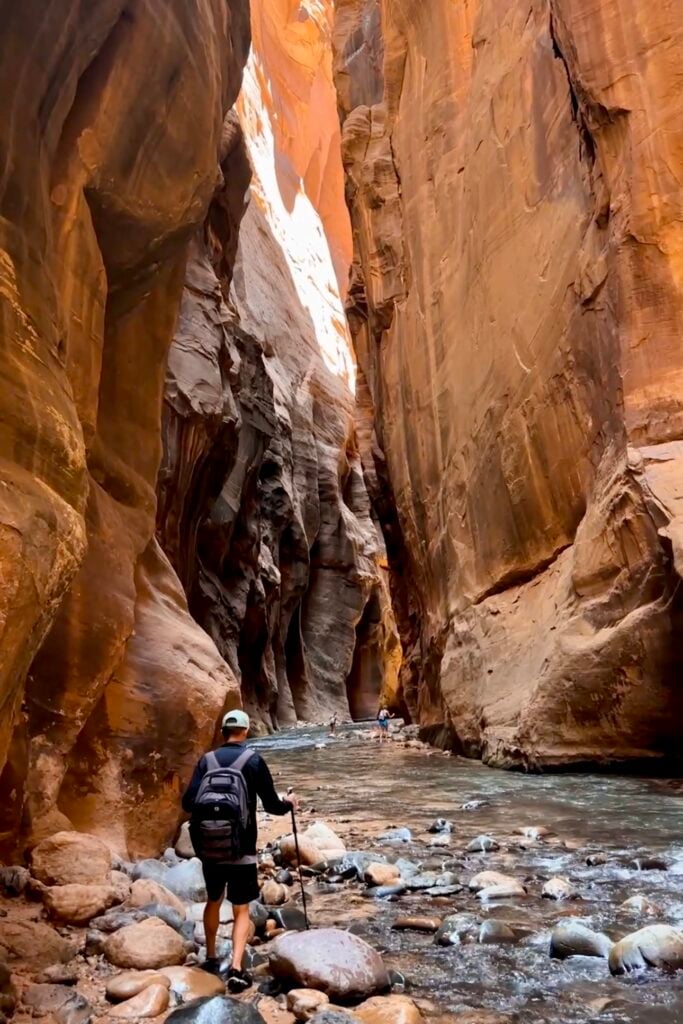
This part of the canyon stretches for about a mile and features dramatic, narrow passageways flanked by sheer 1,000-foot walls. It’s absolutely breathtaking and totally worth the trek.

The full trail is approximately 9.4 miles to Big Spring and back, but you can turn around at any point. I recommend at least going to Wall Street for a 6-mile round-trip hike.
The trail is pretty crowded (especially in the summer), but the majority of hikers turn around at Wall Street. If you keep going, you’ll be rewarded with breathtaking beauty without the crowds.

Roughly 0.4 miles past the beginning of Wall Street, you’ll come to a side canyon on your right called Orderville Canyon. I highly recommend exploring it!
This beautiful slot canyon is significantly less crowded than the main Narrows trail. You’ll still wade through some water here, but it’s generally not deep.
Follow Orderville Canyon for about a half mile until you reach Veiled Falls, a small but scenic 6-foot waterfall.
If it’s your first time hiking the Narrows, I don’t think you necessarily need to hike all the way to Big Spring. For me, the highlight is the Wall Street section.
My recommendation would be to hike to the end of Wall Street and explore Orderville Canyon. This is still about an 8-9 mile round-trip hike.
If you do make it all the way to Big Spring, you’ll find a little oasis with small waterfalls and mossy rocks. My boys hiked to it and said it was pretty, but nothing mind-blowing. Of course, they are teenagers, so take that with a grain of salt! I would still like to do the full trail someday, but I felt completely satisfied with what I saw on this trip.
You are required to have a Zion Wilderness Permit if you would like to keep going past Big Spring. Otherwise, this is the end of the trail, and you’ll need to turn around and head back the way you came.
We absolutely loved hiking The Narrows. It’s a unique, otherworldly experience that you’ll never forget. As long as you come prepared and stay aware of the weather and your surroundings, you’re in for an incredible day!
While you’re at Zion, here are a few more guides you might like:
- Lower Pine Creek Falls: How to Find the Secret Waterfall in Zion
- A Weekend Exploring Zion’s Hidden Gems
- Canyon Overlook Trail: The Best Short Hike in Zion
*CLICK THE BUTTON TO DOWNLOAD AND PRINT THIS GUIDE:
Pin it for later:

Leave a Reply